


- Home
- A-Z Catalogue
- Products
- Valves
- Cetop
- Manual Directional Valves
- Proportional Valves
- Poppet Valves
- High-Speed Linear Servo Valves
- All High-Speed Linear Servo Valves
- Cetop 10 (NG32) Two Stage Type High Speed Linear Servo Valves – LSVHG-10
- Cetop 10 (NG32) Two Stage Type High Speed Linear Servo Valves – LSVHG-10 (With Fail-Safe)
- Cetop 8 (NG25) Two Stage Type High Speed Linear Servo Valves – LSVHG-06
- Cetop 8 (NG25) Two Stage Type High Speed Linear Servo Valves – LSVHG-06 (With Fail-Safe)
- Cetop 7 (NG16) Two Stage Type High Speed Linear Servo Valves – LSVHG-04
- Cetop 7 (NG16) Two Stage Type High Speed Linear Servo Valves – LSVHG-04 (With Fail-Safe)
- Cetop 5 (NG10) Direct Type High Speed Linear Servo Valves – LSVG-03
- Cetop 5 (NG10) OBE Type Direct Operated Linear Servo Valves – LSVG-03-EH
- Cetop 3 (NG6) OBE Type Direct Operated Linear Servo Valves – LSVG-01-EH
- Pumps
- Pressure control
- Flow Control Valves
- Pressure Control Valves
- All Pressure Control Valves
- Brake Valves
- Direct Relief Valve
- Low Noise Solenoid Controlled Relief Valves
- Low Noise Pilot Operated Relief Valves
- Pilot Operated Relief Valves
- Pressure reducing and relieving valves
- Pressure reducing and check valves
- Pressure control valves
- Remote Control Relief Valves
- Solenoid Controlled Relief Valves – BSG
- Solenoid Controlled Relief Valves – BST
- Unloading relief valves
- Check valves
- Environmental
- Valves
- Hydraulic Systems
- Power pack
- About Us
- Contact
- Blog

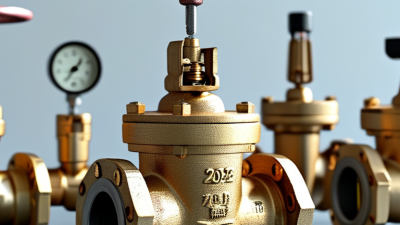
How to Choose a Pressure Reducing Valve in 2026?
Choosing a pressure reducing valve in 2026 is not simply a matter of matching pipe size. The right selection protects equipment, stabilizes downstream pressure, and reduces avoidable maintenance. It begins with real operating details: inlet pressure, required outlet pressure, flow range, fluid temperature, pipe material, and pressure fluctuations. A valve that works well at 50 percent flow may behave poorly near minimum demand.
Philip L. Skousen, P.E., author of Valve Handbook, states, “Valve selection must begin with the process conditions.” That principle remains practical today. Digital monitoring, smart diagnostics, and improved materials can support better decisions, but they cannot correct incomplete specifications. The valve still needs a suitable pressure range, accurate sizing, compatible trim, and an appropriate sensing arrangement. Small details matter. A noisy valve may signal excessive velocity. A vibrating gauge may reveal unstable control. A leaking bypass can quietly undermine the whole system.
This guide examines how engineers and maintenance teams can compare pressure reducing valve designs in 2026. It considers direct-acting and pilot-operated options, water and steam applications, installation position, response speed, and lifecycle cost. Manufacturer data deserves careful review, especially when claimed capacity differs between test conditions and field conditions. That part is easy to overlook.
There is no universal best valve. The most expensive model may be unnecessary, while the cheapest option may create recurring failures. Good selection combines calculations, site experience, and honest attention to uncertainty. Sometimes, the correct decision is to gather better measurements before purchasing anything.

Table of Contents
[Hide]
What Is a Pressure Reducing Valve and How Does It Work?
A pressure reducing valve lowers excessive inlet pressure to a safer, controlled outlet pressure. It protects pipes, fixtures, pumps, and sensitive equipment from sudden pressure changes. The valve senses downstream pressure through a diaphragm or piston. When outlet pressure rises, the valve closes slightly. When pressure falls, it opens and allows more fluid to pass.
The working principle is simple, but real systems are less predictable. Flow demand changes during the day. A shower may open while several machines operate nearby. Direct-acting valves suit smaller systems with fairly stable demand. Pilot-operated valves usually provide tighter control in larger or fluctuating installations. Check the inlet pressure, required outlet pressure, flow rate, fluid temperature, and pipe size before choosing one. Measure twice. A valve that is too small may create noise and pressure loss.
Material selection also matters. Confirm compatibility with drinking water, compressed air, steam, or other approved media. Review the manufacturer’s pressure range, adjustment method, filter arrangement, and maintenance access. A pressure gauge before and after the valve helps technicians identify blocked strainers or worn internal parts. In 2026, smart monitoring can reveal pressure trends, but sensors still need calibration and protection from moisture. A perfect setting rarely exists. Field conditions may expose assumptions made during design, so test the valve under both low and peak demand. Shortcuts here can become expensive.
Related Posts
-
How to Choose a Pressure Reducing Valve in 2026?
-

Best Hydraulic Check Valve for Global Buyers in 2026?
-

Top Benefits of Yuken Hydraulics for Industrial Applications?
-
How to Choose the Right Servo Valves for Your Applications?
-

2025 Top 10 Check Valves Trends Innovations and Market Statistics
-

Top Flow Control Techniques for Efficient Process Management?