


- Home
- A-Z Catalogue
- Products
- Valves
- Cetop
- Manual Directional Valves
- Proportional Valves
- Poppet Valves
- High-Speed Linear Servo Valves
- All High-Speed Linear Servo Valves
- Cetop 10 (NG32) Two Stage Type High Speed Linear Servo Valves – LSVHG-10
- Cetop 10 (NG32) Two Stage Type High Speed Linear Servo Valves – LSVHG-10 (With Fail-Safe)
- Cetop 8 (NG25) Two Stage Type High Speed Linear Servo Valves – LSVHG-06
- Cetop 8 (NG25) Two Stage Type High Speed Linear Servo Valves – LSVHG-06 (With Fail-Safe)
- Cetop 7 (NG16) Two Stage Type High Speed Linear Servo Valves – LSVHG-04
- Cetop 7 (NG16) Two Stage Type High Speed Linear Servo Valves – LSVHG-04 (With Fail-Safe)
- Cetop 5 (NG10) Direct Type High Speed Linear Servo Valves – LSVG-03
- Cetop 5 (NG10) OBE Type Direct Operated Linear Servo Valves – LSVG-03-EH
- Cetop 3 (NG6) OBE Type Direct Operated Linear Servo Valves – LSVG-01-EH
- Pumps
- Pressure control
- Flow Control Valves
- Pressure Control Valves
- All Pressure Control Valves
- Brake Valves
- Direct Relief Valve
- Low Noise Solenoid Controlled Relief Valves
- Low Noise Pilot Operated Relief Valves
- Pilot Operated Relief Valves
- Pressure reducing and relieving valves
- Pressure reducing and check valves
- Pressure control valves
- Remote Control Relief Valves
- Solenoid Controlled Relief Valves – BSG
- Solenoid Controlled Relief Valves – BST
- Unloading relief valves
- Check valves
- Environmental
- Valves
- Hydraulic Systems
- Power pack
- About Us
- Contact
- Blog

How to Use a Digital Crimper for Precise Connections?
Making precise electrical connections requires more than squeezing a handle and hoping for a clean result. A Digital Crimper combines controlled pressure with electronic feedback, helping technicians create consistent terminals across repeated jobs. Its display may show force, cycle data, or setting information, depending on the model. These details can reduce guesswork when working with copper wire, insulated terminals, and carefully specified connector systems.
Accuracy begins before the crimping cycle. Select the correct die for the terminal and wire size. Check the conductor for damaged strands, oxidation, or uneven stripping. Place the terminal squarely, then insert the wire until the conductor reaches the required stop. Small errors matter. After crimping, inspect the barrel for distortion, loose strands, or incomplete compression. A gentle pull test can reveal weakness that looks invisible at first glance. For critical work, follow the connector manufacturer’s specifications and record tool settings for repeatability.
A Digital Crimper is helpful, but it is not foolproof. Displays can be misunderstood, batteries can weaken, and tools can lose calibration through heavy use. I have found that a quick visual check often catches problems before testing does. That habit may seem slow. It protects reliability. This guide explains practical setup, operating technique, inspection steps, and maintenance practices for achieving dependable connections without relying on pressure alone.
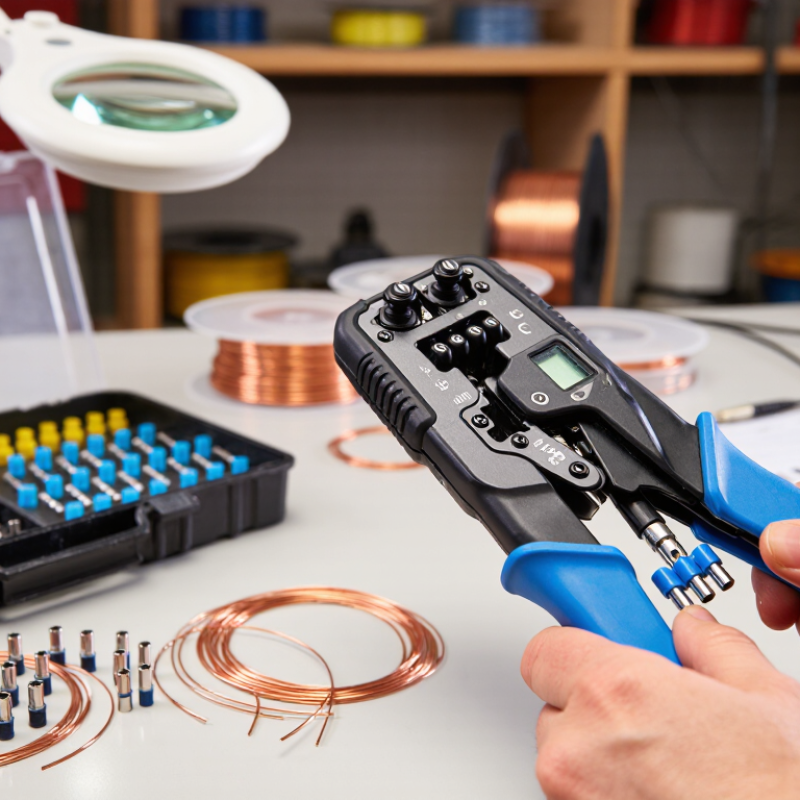
Table of Contents [Hide]
Understanding Digital Crimper Components and Connection Requirements
A digital crimper creates repeatable electrical and mechanical connections when its components match the terminal system. The die set shapes the terminal. The locator holds it in position. A force sensor detects incomplete compression, while the display records pressure, cycle count, and error codes. Some models also store calibration histories. That record matters during audits.
Connection requirements must be checked before the cable enters the tool. Confirm the conductor size, terminal material, insulation diameter, and approved crimp profile. The wire should reach the correct stop without excessive stripping. Copper strands must remain aligned. A loose strand can weaken the joint.
IPC/WHMA-A-620E provides workmanship criteria for cable and wire-harness assemblies, including crimp appearance and inspection points. IEC 60352-2 also defines requirements for solderless crimped connections and mechanical performance.
Demand for reliable harness work is rising. The International Energy Agency reported over 14 million electric cars sold worldwide in 2023. More vehicles mean more compact, vibration-sensitive connections. A digital tool helps control variation, but it cannot correct the wrong die. It cannot repair damaged strands. It also cannot replace pull testing. The U.S. Federal Aviation Administration emphasizes documented inspection and tool control in aircraft wiring guidance, showing why traceability remains practical, not decorative. In daily work, I still find one weak habit: operators trust the screen too quickly. Check the crimp height. Inspect the bellmouth. Perform a sample pull test. Mistakes become visible there.